Add Automatically Hide Taskbar to Context Menu in Windows 11/10
To add the automatically hide taskbar option to the context menu in Windows 11/10 OS, we are going to make some changes to Windows Registry. So, before proceeding, it is good to backup Windows Registry or simply create a system restore point so that any unwelcomed or unexpected changes can be undone easily. Now check the steps covered below:
Open the Registry EditorAccess the Shell Registry keyCreate a HideTaskbar keyCreate the following String values under the HideTaskbar key:IconMUIVerbPositionSubCommandsAdd value data for all these String valuesCreate a shell key under the HideTaskbar keyCreate a 001flyout key in the shell Registry keyAdd MUIVerb String Value under 001flyout keySet Value data for MUIVerb to Turn onCreate a command name key in the 001flyout keyAdd Value data for Default String Value present under command keyCreate a 002flyout key under the shell keyAdd MUIVerb String Value under 002flyout keySet Value data for MUIVerb to Turn offCreate a CommandFlags DWORD value under the 002flyout keySet its Value dataCreate a command name key in the 002flyout keySet Value data for Default String Value present under the command keyClose Registry Editor window.
Let’s check all these steps in detail. Just carefully follow each individual step and everything will be done easily. Type regedit in the Search box of your Windows 11/10 computer and hit the Enter key to open the Registry Editor. Go to the Shell key available under the main or root Registry key. The path is: Right-click on the Shell key, open the New menu and select the Key option. Rename the newly created key to HideTaskbar, as visible in the image above. After doing that, create a String Value under the HideTaskbar key. For that, right-click on the HideTaskbar key, open the New menu, and select the String Value option. When the new String Value is created, rename that value to Icon. In the same way, create three more String values under this HideTaskbar Registry key and rename them to MUIVerb, Positions, and SubCommands.
Now you have to set the Value data for all those four String values one by one. Double-click on the Icon String Value to open its Edit String box. Put imageres.dll,-80 in the Value data field in that box. Use the OK button.
Double-click on the Position String Value to open its edit box. Type Bottom or Up in the Value data field. Press the OK button. This is just to set where you want to see the automatically hide taskbar option in the context menu.
Continue the process and double-click on the MUIVerb String Value. In the Edit String box, type Automatically hide taskbar in the Value data field. Hit the OK button.
Leave the SubCommands String Value as it is. You don’t have to set its Value data. Come back to the HideTaskbar Registry key and create a shell key under it. In the shell key, create a sub-key with the name 001flyout. On the right-hand side of the 001flyout key, generate a new String Value with the name MUIVerb. After doing that, open the Edit String box of the MUIVerb value by double-clicking on it. Add Turn on in the Value data and use the OK button.
In the 001flyout Registry key, create a command name sub-key. A Default name String Value will be created for that sub-key automatically. You don’t have to create it. Open the Edit String box of Default String Value and add the following data to the Value data:
Click on the OK button to close the Edit String box of Default String Value. Now, come back to the shell sub-key which is present under the HideTaskbar key. This time, create a 002flyout name sub-key inside the shell key. On the right-hand section of 002flyout, create a DWORD value and a String value with the names CommandFlags and MUIVerb.
Double-click on the CommandFlags DWORD value and its Edit DWORD (32-bit) Value box will open. Select the Hexadecimal option in the Base section and put 20 in the field available for Value data. Click on the OK button.
Open the Edit String box for MUIVerb and type Turn off in the Value data. Click on the OK button.
Select the 002flyout Registry key and create a command name sub-key under it. A String Value with a Default name will be created automatically for that sub-key. Double-click on that Default value and the Edit String box will pop up. Put the following data in the field available for Value data:
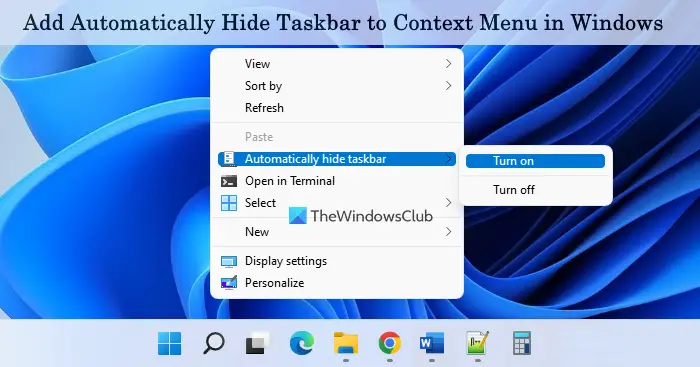
Click on the OK button. That’s all! The work is done but you might need to restart File Explorer to save the changes. After that, when you will open the desktop context menu, the Automatically hide taskbar option will visible. Accessing that option will show you the Turn on and Turn off options that you can use as per your requirements.
How do I automatically hide the taskbar in desktop mode?
If you are using Windows 10 OS, then first access the Personalization category in the Settings app. Open the Taskbar page present under that category and select Automatically hide the taskbar in desktop mode. This will apply the changes instantly. If the taskbar is not hiding for some reason, then try fixes like restarting the File Explorer, changing the notification settings, etc.
How do I Auto-hide the taskbar in Windows 11?
To automatically hide the taskbar on a Windows 11 computer, access the Taskbar page available under the Personalization category of the Settings app. After that, expand the Taskbar behaviors section and select Automatically hide the taskbar option. Or else, you can also add an automatically hide taskbar option in the desktop context menu. For that, you can follow the steps added in this post. Read next: Taskbar not hiding in fullscreen mode in Windows.

