Note: In Windows 7 and Vista, the default Thumbnail Preview is the Miniature Photographs. If you don’t like it, you can change it to No border or Straight border for the minimal looks.
Change Border of Thumbnail Preview in Windows 11/10
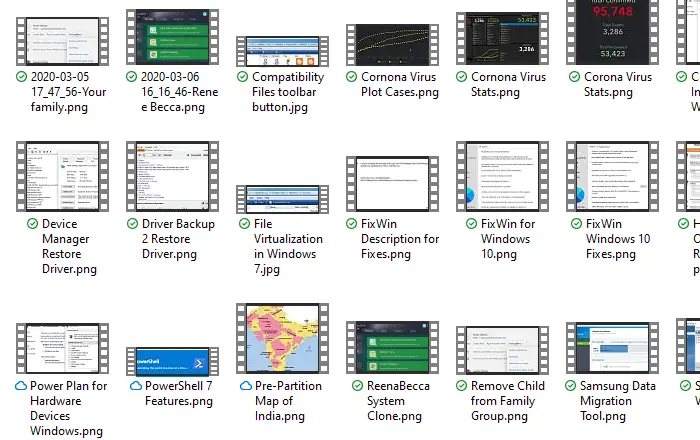
The default Thumbnail Preview Border appears as Miniature Photographs (Windows 7) or Straight border (Windows 10). You can, if you wish, tweak the registry to make them seem like a video film cutting along with the ‘sprocket-holed’ perforated borders. It is also called as the Photo border. Here we will use the registry method to tweak the thumbnail preview.
To do so, type ‘Run’ in the Start menu search bar or use Win + R.Then, in the ‘Run’ dialog box type ‘Regedit’ and hit enter.It will open the Registry Editor. Navigate to the following key:
In the right panel, right-click on Treatment and select Modify. Change the hexadecimal value of this to 3, from its default 2.You can then either choose to reboot or restart Windows Explorer by killing it from the task manager or in Windows 10; you have the Restart option.
Open any folder where you store your images and ensure that the thumbnail view is selected. You should notice the change. You can also apply the values 0 and 1, but they don’t make any substantial visual difference. If you find using the registry editor difficult, then you can also use Ultimate Windows Customizer for Windows 7 or Windows 10 to do it quickly.
How do I change the thumbnail in File Explorer?
Although it is not possible to change or replace the thumbnail in File Explorer in Windows 11 or Windows 10, you can enable or disable thumbnails. For that, open the Folder Options panel. After that, switch to the View tab and tick the Always show icons, never thumbnails checkbox. Finally, click the OK button.
How do I change the preview pane size in Explorer?
To change the preview pane size in File Explorer on Windows 11/10, you need to use your mouse. First, enable the Preview pane in the File Explorer. Then, click on a file you want to check the preview of. After that, hover your mouse over the Preview Pane border, click on it and move it to the left or right. While it’s only a minor tweak and not many people would like to change it, but if you are a fan of those film strips, you still have the feature. I hope the post was easy to follow, and you were able to change the thumbnail preview border in Windows 10/8/7 in File Explorer.