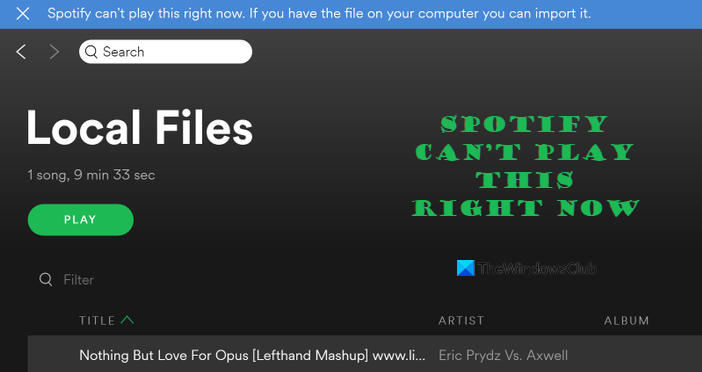
Why does Spotify keep saying can’t play this right now?
The reason behind this situation could have a lot to do with audio drivers, or in another instance, Spotify itself may have issues with corruption.
Why is Spotify giving me an error message?
Spotify, despite being one of the best apps for listening to music, is not perfect. From time-to-time users will find themselves dealing with one or multiple error codes, and the cause for this varies.
Fix Spotify can’t play this right now error on Windows 11/10
Solving this problem may require the user to perform multiple actions, but nothing is designed to have you around the computer for a long time. The information below should help you in more ways than one, hopefully.
1] Restart your computer
Before you go any further, we want you to restart your Windows 11 computer. In most cases, restarting the computer is a great way to get rid of issues plaguing Spotify. To do this, you can right-click o the Start Menu button, then hover the mouse cursor over Shut Down or Sign Out. From there, select Restart, and that’s it.
2] Disable Spotify’s hardware acceleration feature
Hardware acceleration is great if you do not want to have software algorithms doing the heavy lifting. By default, Spotify has hardware acceleration turned on, but you can turn it off with ease since it is capable of causing the Spotify can’t play this right now. In order to get this done, you must open the Spotify app, and from there, click on the Ellipsis button from the top-left of the app. From there, select View, then deselect Hardware Acceleration. Restart the Spotify app, then check if the error is still popping up out of nowhere.
3] Delete the local Spotify cache files
If you are one of the many people experiencing the Spotify can’t play this right now error and the above information failed to work, then we suggest deleting the local cache files directly linked to Spotify. In order to get the job done, you must close Spotify, then launch the Run dialog box by pressing the Windows key + R. When the text area makes an appearance, you will want to type the following and hit Enter: %appdata% When the AppData folder opens, go to Spotify > Users, then click on your username. From within the folder, please delete the file named local-files.bnk, then start Spotify once the task is complete.
4] Change the streaming quality on Spotify
Yes, the app does offer the ability to change the Streaming quality with ease. Do this by clicking on the Ellipsis button, then go to Edit > Preferences. Scroll down to Audio Quality and from there, you can easily change the quality of the stream.
5] Change the speaker Output format
If you’re still having problems, then we suggest changing the Output format of your speaker to a number below 192000 Hz. Let us explain how to accomplish this in both Windows 11 and Windows 10. Windows 11
Press the Windows key + I to open the Settings menu.Click on System via the left panel.Right away you must choose Sound.Scroll down until you come across All Sound Devices.Select it.From under Output Devices, please click on Speakers.Look for Format under Output Settings.Via the dropdown menu, change the bit quality to DVD Quality.
Now, go ahead and play a song on Spotify to see if things are working accordingly. Windows 10
Open the Settings menu by pressing the Windows key + I.Click on System from within the Main Menu of the app.From there, select Sound from the left panel of the app.Look to the far right and select Sound Control Panel located under Related Sound Settings.A small window should now be visible.Via that window, select Speakers.At the bottom of the window, click on Properties.From the window that appears, please select the Advanced tab.Choose the DVD Quality option from the dropdown menu next to the Test button.
Check now to see if Spotify is playing back content as it should.
6] Ensure the Output device is set to Default
We’ve come to understand that if the Output device is not set to the Default, then there is a good chance Spotify could be affected. In order to make the changes, please follow the steps below for both Windows 11 and Windows 10. Windows 11
Open the Spotify app.Launch the Settings app by pressing the Windows key + I.After you’ve done that, it is time to click on System via the left panel.Waste no time by selecting Sound.Scroll down to the Advanced section and click on Volume Mixer.Look for Spotify Music under the Apps section. Not the Apps category from the left panel.To the right of Spotify Music, click on the arrow pointing downwards.If the Output Device is not set to Default, then please go ahead and make the relevant changes.
You can now play your favorite tunes on Spotify to see if things are working correctly. Windows 10
Open the Spotify app if you haven’t already.Fire up the Settings app by pressing the Windows key + I as per usual.Click on System right away.Next, you must select Sound via the left panel of the Settings app.Look to the bottom of the app for Advanced Sound Options.Click on that option promptly.From the next window, then, look under App Volume for Spotify Music.If the Output is not set to Default, then please do so.
Hopefully, the Spotify error is no longer popping up when you attempt to playback music.
7] Uninstall & reinstall Spotify
If nothing helps, you may uninstall & then download and install Spotify and see if that works. We should point out that the error Spotify is facing can be caused by a multitude of issues, and it is possible these solutions will work for some users but fail for others. Therefore, if you’re still having problems, then do not hesitate to let us know. Read: How to fix Spotify Error Code 13 or 7.

