At times, you might need to remove the background of an image, reduce the file size or resolution of a photograph to comply with an online application’s restriction. Instead of purchasing a paid tool, you can use the in-built options – Microsoft Paint and Paint 3D. Both tools can help you edit images.
How to change file size using MS Paint
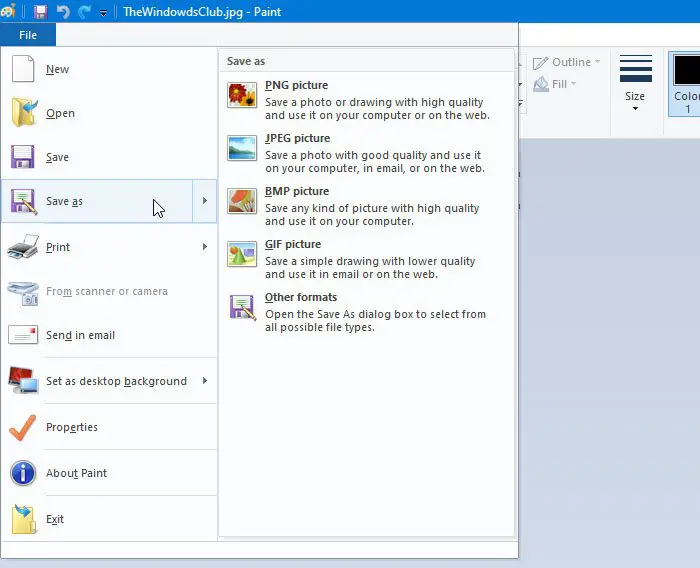
To change file size using Microsoft Paint, follow these steps- To begin, open the Paint app on your computer. You can use the Taskbar search box to open it. After that, press Ctrl+O and select the image to open it in the Paint app. Next, click the File option and choose Save as.
Following that, you need to choose a location where you want to save the file. Now, select JPEG from the Save as type drop-down menu, and click the Save button. Now, check the size of the new file and compare it with the old one. While testing, a 15.1 KB file became 11.9 KB within moments, which is around 21% reduction. If you open the image in Paint and save a copy of the file, the size gets reduced automatically. However, if you have an image containing some text only, you might not find a significant reduction.
How to change file size using Paint 3D
To change file size in Paint 3D, follow these steps- Open the Paint 3D app using the Taskbar search. Next, open the image in this app. Click the Menu button that is visible on the top-left corner and select Save as on the next screen.
Next, choose Image as the file format. You should see a familiar screen from where you have to select a location to save the file, select 2D-JPEG from Save as type, and click the Save button.
Then, you can compare the size of the new file with the old one. While testing, the 15.1 KB file became 9.7 KB, which is almost a 36% reduction.
How to change file resolution in Paint
To change file resolution in Paint, follow these steps- Let’s delve into the steps in detail. At first, open the image in Paint. For that, you need to open the Paint app first, and then; you can use Ctrl+O shortcut to open the picture in the app. Now, make sure that you are in the Home tab. Here you can find an option called Resize. You need to click on this option.
There are two ways to change the resolution. You can increase or decrease the dimension by percentage or pixel. Choose a method and set the resolution as per your requirements.
Click the OK button to set the resolution. Now, you can use the Ctrl+S to save the file. However, if you want to save a copy of the file, you need to use File > Save as option.
How to change file resolution in Paint 3D
To change file resolution in Paint 3D, follow these steps- Read on to know more about these steps. At first, open the Paint 3D app and open your image in this tool. After opening the file, you need to switch to the Canvas tab.
Here you can find a drop-down menu from where you can choose whether you want to change the dimension by percentage or pixel. Select a method as per your desire and set the resolution accordingly. Now, press Ctrl+S to save the file. Bonus tip: If you keep the tick in the Lock aspect ratio box, you do not need to change the height and width separately. I hope these simple tutorials would help you.