How to check Print History in Windows 11/10
You can check the Print History to know which documents or files have been printed from your system with or without your knowledge. You can also use it to crosscheck if you’ve already printed a document, or how many documents you print on monthly basis to keep a track of the inventory. In Windows 11, you can check the Print History using the following methods: Let us see these in detail.
1] Check Print History using Printer Settings
You can check the print queue to see which documents are currently being printed and what are the upcoming print jobs. However, once the document is printed, its record gets deleted from the printer’s print queue. In order to save this record and see which documents have been printed in past, you need to manually enable the ‘Keep printed documents’ option in Windows 11.
Click on the Start button icon in your taskbar area.Select Settings.Click on Bluetooth & devices in the left panel.Then click on Printers & scanners in the right panel.Select a printer from the list of available devices.Open Printer properties.Within the Printer properties window, switch to the Advanced tab.Select the checkbox corresponding to the Keep printed documents option.Click on the OK button.
This will enable the Printer’s print queue to remember the print history. If your system is connected to multiple printers on a local or shared network, you will have to enable this option separately for each of the connected printers. To view the print history, select Start > Settings > Bluetooth & devices >Printers & scanners and then select the printer in the list of available devices. Then click on the Open print queue option. You will be able to view your print history in the printer’s print queue.
A printer’s print queue has limited space, so it keeps replacing the existing records with new records whenever the data of the print log goes beyond its capacity. By using this method, you will be able to see the history of print jobs for a limited period of time. If you want to maintain a long-term log of your print history, you should use the next method.
2] Check Print History using Event Viewer
Event Viewer is a Windows application that keeps a log of everything that happens on your system right from the moment it starts till it shuts down. You may use it as a troubleshooting tool to see errors and warnings generated by different apps and software installed on your system. If you want, you can configure it to remember the print history on your Windows 11 device.
Right-click on the Start button icon to open the WinX menu.Select the Event Viewer option.In the Event Viewer window, navigate to the following path: Applications and Services Logs\Microsoft\Windows\PrintService.In the right panel, right-click on the Operational option.Then select the Properties option from the context menu.In the Log Properties window that appears, select the checkbox corresponding to the Enable logging option. You may also specify the maximum log size and choose what your system should do when the maximum event log size is reached (overwrite events, archive log, clear logs manually).Click on the Apply button.Then click on the OK button.
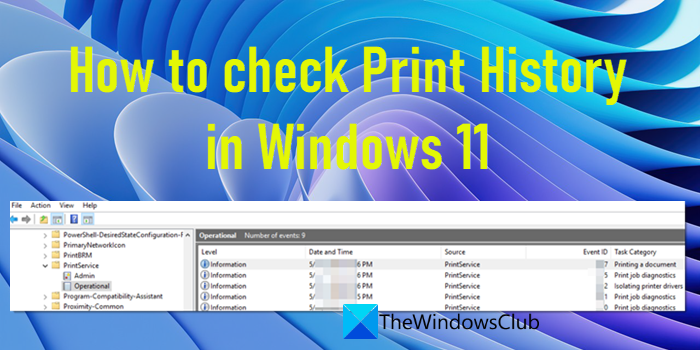
From now onwards, Windows Event Viewer will keep a log of your printed documents. To view this log, navigate to Applications and Services Logs/Microsoft/Windows/PrintService. Then in the right panel, double-click on the Operational option. Now you will be able to see the event log for print jobs issued from your system. Also Read: Deleted Printer keeps reappearing & coming back in Windows 11/10.
3] Check Print History using third-party print logging software
A few third-party tools also allow you to view print history on Windows 11. PaperCut Print Logger is one such free tool that you may install in your system to keep a track of the documents printed from your system. It shows useful information such as the time of print, the user who issued the print command, the document name or title, the total number of pages in the document, and other print job attributes such as paper size, print mode, etc. Download PaperCut Print Logger free. Double-click on the downloaded file to run the installer. Follow the on-screen instructions to install the software. Once Print Logger is installed, it will sit in the background and monitor all the print activities on your Windows 11 PC. It can also monitor printing on network printers if it is installed on a server that hosts the print queues. To check the Print History, open File Explorer and navigate to the location where you’ve installed the software. By default, it is C:\Program Files (x86)\PaperCut Print Logger. Now double-click on the ViewLogs shortcut. This will open a webpage in your preferred web browser detailing all the print activities that have occurred in your system since Print Logger was installed. You can also create a desktop shortcut for easy access to the print log. If you want, you can prevent Print Logger from monitoring a specific printer by adding the printer’s name in the IgnoredPrinters setting in its configuration file, which is located at C:\Program Files (x86)\PaperCut Print Logger\papercut-logger.conf. Apart from Print Logger, there are several other third-party software that you may install to view Print History in Windows 11. Hope you find this useful. Read Next: How to see Recently Opened Files in Windows.

