Before we go forward, just bear in mind that this feature is only available on the desktop version of Microsoft PowerPoint at the time of writing. Things will likely change in the future and users will be able to compress photos in Office Online, but for now, this is it.
How to compress all Pictures in PowerPoint
Make sure to follow the instructions in this article in order to keep the images in your PowerPoint presentation in the best size possible.
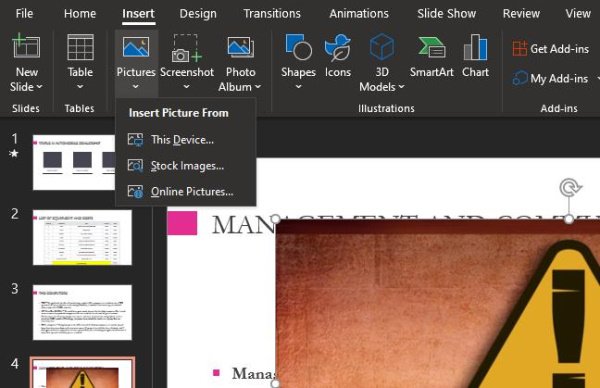
1] Add your photos to a Slide
Before we go on ahead and compress images, users must first add a photo to their presentation if one hasn’t been added already. In order to accomplish this, folks must first click on the Insert section at the top, then from there, select Pictures and choose from the options available via the dropdown menu to include an image. Read: How to save PowerPoint Presentation Slides As High Resolutions Images.
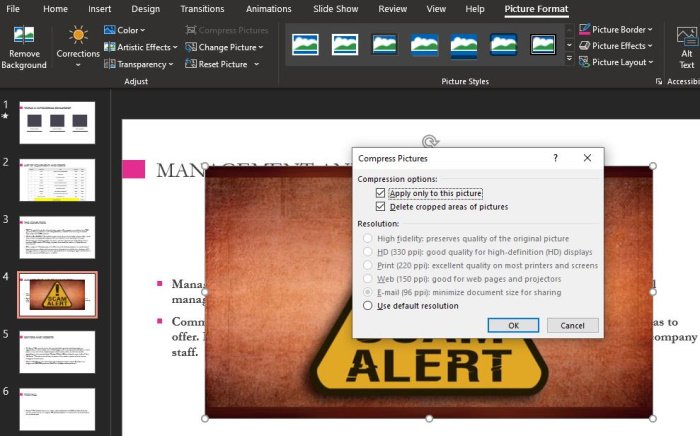
2] Compress your pictures with ease
When it comes down to compressing the image or images you’ve just added, this is a simple task to accomplish. In order to get it done, you must first select the image in the slide, and right away you should see some changes made to the menu above. It will automatically switch over to Picture Format, so the first thing to do here, is to click on the section that says Compress Pictures. A small window will appear in the middle of the Slide. Select the option you wish for the picture. They are as follows: Select any one option from that list, then hit the OK button to compress the image. Now, before hitting the OK button, you can choose to have the changes made affect all pictures in the presentation and to automatically delete cropped sections of all photos. When everything is done, go on ahead and save your PowerPoint presentation.
![]()