How to convert Illustrator Images for use in PowerPoint
A PowerPoint presentation with low-quality images can be a turnoff. Presenting important data to clients or potential clients with images that are low-quality may cause you those clients. Low quality PowerPoint Images can make you look unprepared or lack knowledge. This can make clients, or your superior lose confidence in your abilities. A PowerPoint presentation with crisp high-quality images can enhance your presentation. This can make clients; potential clients and your superiors see you as prepared and knowledgeable. You can use Illustrator to create high quality images for your presentation. You may also have other images that you would like to convert to high quality in Illustrator then place in your PowerPoint. You can use Illustrator to convert these images to vectors and then put them in your PowerPoint. Depending on what the presentation is about, you may have hand drawings that you need in your presentation. You can use Illustrator to convert hand drawings to vector and then use them in your PowerPoint.
1] Open or Create Image in Illustrator
Open Illustrator and open the image that you want to convert for use in PowerPoint. You may have also just created the image, so you can convert it to PowerPoint. To access the image if it is already saved on your computer, go to File then Open then search for the file, select it then click Open. If you were already working on the file in Illustrator, you would skip the open step and go to the next step. Make sure that the image is not zoomed or scaled by going to the top of the window and pressing View then Actual Size or press the shortcut Ctrl + 1. This will make the image display as the actual size that it should be. Make sure that the document is in the RGB color mode by going to File then Document Color Mode. You may see the CMYK color mode selected, just select RGB. RGB is the color mode that will work for PowerPoint.
2] Convert for PowerPoint
Go to File then Export to start the process of making the image compatible with PowerPoint.
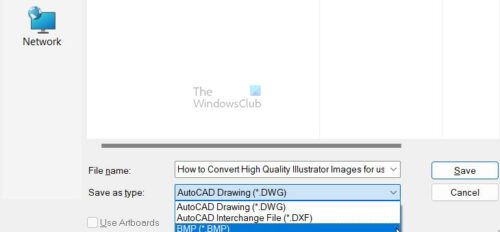
The Export options window will come up, type the file name and choose BMP as the Save as Type. Press Save to confirm to options chosen or Cancel.
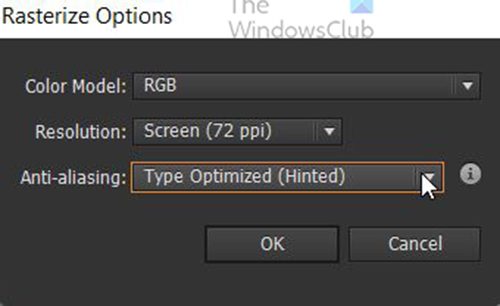
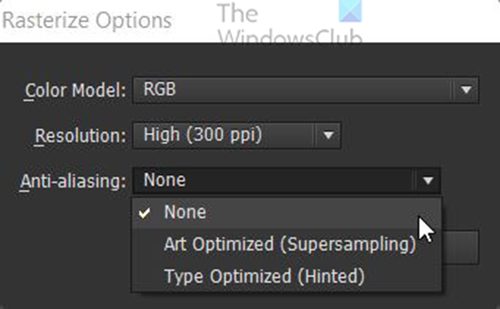
When you click Save the Rasterize Option window will appear.
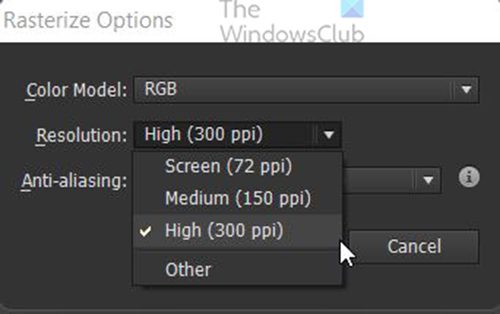
Choose for Resolution High (300 ppi).
Choose for Anti-Aliasing None. Click Ok to confirm the options.
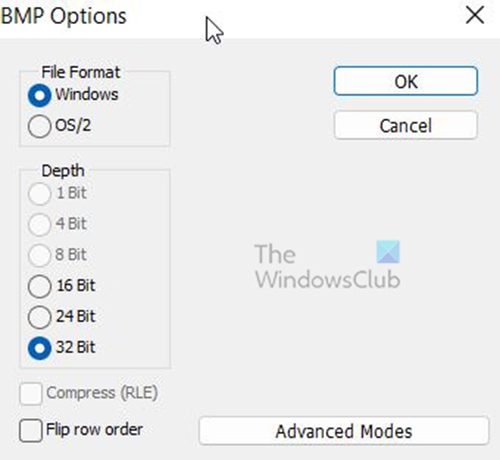
The BMP Options window will appear. Choose Windows for File Format and 32 Bit for the Depth then click OK. The Illustrator file will be exported as a high-quality BMP file.
3] Place in PowerPoint
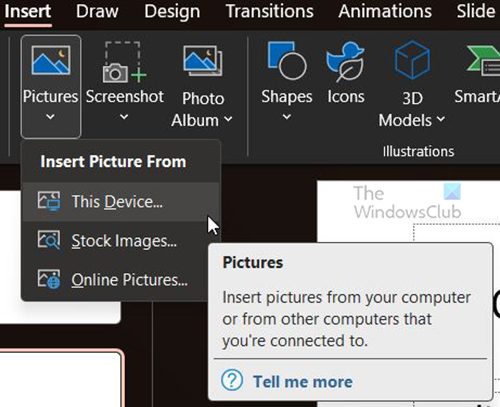
Open PowerPoint and open a previous or new PowerPoint document. Choose the slide that you want the BMP image on and go to the top of the window and press Insert then Picture then click This Device. The Insert Picture window will appear, search for the location of the BMP file, click it, and Click Insert. The image will be placed in PowerPoint. You can resize it to fit your needs. Go to File then Save or Save As to save the PowerPoint document. Now you have high quality images in your PowerPoint presentation. Read: How to automate Tasks with Illustrator Actions
What is a BMP file format?
Although you may see this format occasionally referred to as Device Independent Bitmap (or DIB), a BMP file stands for bitmap. Microsoft originally developed the BMP format for its Windows operating system to maintain the resolution of digital images across different screens and devices. It can store two-dimensional images either in color or black and white. These days, BMP files are no longer restricted to just Windows devices. Many Mac and Android devices are now compatible with them. They’re easy to spot, too — just keep an eye out for the .BMP file extension.
What’s the difference between BMP and JPEG files?
BMPs are generally large, uncompressed files. They are great at handling detailed, high-quality images, but at the same time, this makes them harder to share and store. JPEGs, on the other hand, are easy to share or use on websites because they’re compressed into a smaller size. But each time you compress a JPEG, it will lose some of its image data.
Advantage & Disadvantages of BMP Files
BMP file advantages
Each BMP is device-independent, meaning it can be stored and displayed across different devices and screens without losing quality.The BMP format is highly versatile — it can handle multiple color depths, profiles, and alpha channels. It can also support data compression.BMPs are compatible with numerous web browsers and software types. Adobe Photoshop is just one of the image editing programs that support this file format.
BMP file disadvantages
Some people believe the BMP file format may be outdated because it was designed for older Windows desktop applications, before mobile Android and Apple devices became popular.Uncompressed BMPs can have much larger file sizes than JPEGs and PNGs, making it more difficult to share them. They can also be too big to use on websites or to store on hard drives that don’t have a lot of extra space available.BMPs can only contain RGB images, which is something to keep in mind if you regularly work in CMYK.
When Should I Save in BMP File Format?
It is best to use the BMP file format to save when you want to save large high-resolution files to use. It is best to use BMP when you will not be using the file on the web as it will use up a lot of bandwidth and transfer will be slow so your website will slow down. You can use BMP files when you are using RGB color mode images as BMP cannot be used for CMYK color mode images.
Are BMP files smaller than PNGs?
PNGs are a lossless compressed file format, which means that they tend to be smaller in size without losing any of their key data in the compression process. PNGs are generally smaller in size than BMP files, which are normally uncompressed and contain more data.
