Disable Snipping Tool or Print Screen in Windows 11/10
Using Group Policy Editor or GPEDIT
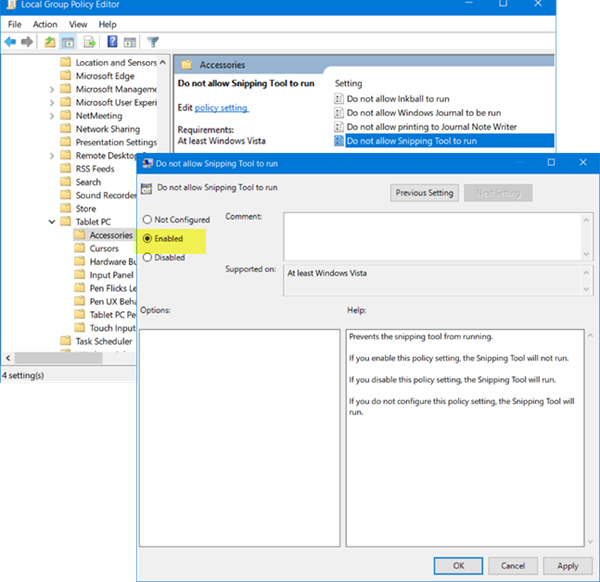
Type ‘gpedit.msc’ in Start Search and hit Enter to open the Local Group Policy Editor. Next, navigate to the following setting: Here, on the right-side, double-click on ‘Do not allow Snipping Tool to run’ to open its Properties and select ‘Enabled’ option to disable the Sniping Tool in Windows 10. To enable the Snipping Tool again, select Not Configured and then click Apply button.
Read: Disable Print Screen button to open screen snipping in Windows 11
Using Registry Editor or REGEDIT
Run regedit to open the Registry Editor and navigate to the following key: Double-click on DisableSnippingTool and change its value data from 0 to 1 to disable the Snipping Tool in Windows 10. To enable the Snipping Tool again, you may change its value back to 0. If the TabletPC Key doesn’t exist, you will have to create it along with the DWORD (32-bit) Value DisableSnippingTool. Read: Snipping Tool Tips & Tricks. NOTE: Windows 11/10 allows you to uninstall (or reinstall) the Snipping Tool via Settings > Apps > Apps & features > Optional features. Hope this works for you!