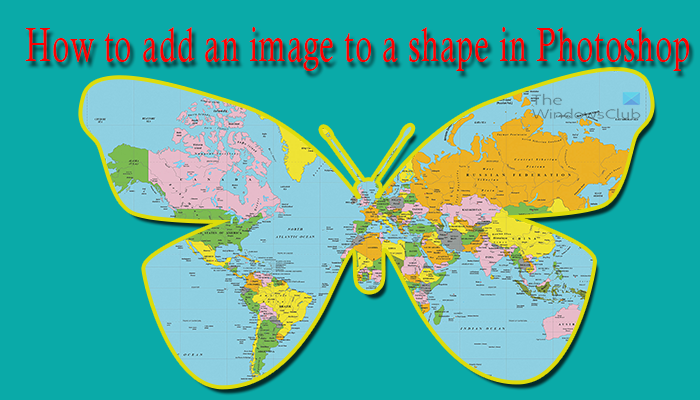
How to insert Image into desired Shape in Photoshop
Learning how to add an image to a shape in Photoshop is very easy to learn and to do. It is also a great way to add interest to an artwork. The shape serves as a frame, a stroke can be added to give that effect even better. You can put an image inside a shape or cut a picture into a shape using Adobe Photoshop by following these steps:
1] Prepare the shape
The first step that will be used is the preparation of the shape. You will have to open Photoshop and then prepare the canvas by selecting the appropriate options in the New document options window. You will then use preset shapes that are available in the Custom shape tool panel. To access the Custom shape tool panel go to the left panel and look for the Custom shape tool, it is in the same group as the Rectangle tool, Rounded rectangle tool, Ellipse tool, Polygon tool, and Line tool. If the Custom shape tool is not visible, click and hold any of these tools until a pop put menu appears, then select the Custom shape tool. Go to the canvas then click and drag, you can hold the Shift + Alt keys while dragging the shape on the canvas. The size of the shape will be based on your choice, drag to an appropriate size for your project. You can give the shape a fill color and stroke so that it is easy to see on the canvas.This is the shape with stroke applied.
2] Add the image to the shape
You will then have to choose the image then add it to the shape.
This is the image and the shape together. When you have chosen the image that you want to place in the shape, you will have to place the image in photoshop. The image layer will have to be placed above the shape layer. You would have noticed that each item you add in Photoshop is placed on a separate layer. Ensure that the image layer is above the shape layer. If the image layer is below the shape layer, click and drag the image layer above the shape layer. You can also select the image layer and hold Ctrl and press ] key to move it up. Note that when you have the image over the shape then the shape will be hidden so you cannot see if you need to adjust the shape or image. You can get around that by clicking on the shape layer, this will show an outline of the shape through the image. this way you can make adjustments if any are needed.
Create clipping mask
When the image layer is positioned above the shape layer, right-click on the image layer and click Create clipping mask.
You will notice that the image takes the shape of the shape. In the layers panel, you will see that the image layer has an arrow pointing down, this means that it has the clipping mask applied to it.
Make adjustments
Even though the clipping mask is applied, the shape and the image can still be adjusted as they are still independent. You may want to resize the shape so that the image shows smaller or bigger. You can resize the shape and also the image as they are still independent. Click on the layer that you want to move or resize and move or resize it. You may want a certain part of the image to show more within the shape so click on the image layer then use the mouse or the direction keys to move the image. when you are finished making adjustments, you should link both layers to prevent movement. You should select both layers in the layers panel then click the chain icon at the bottom of the layers panel. This will link both layers and they will move together and resize together. If you want to unlink the layers, you can just select them and click on the chain icon at the bottom of the layers panel.
3] Add a stroke to the shape
You can enhance the overall look of the artwork by adding a stroke to the shape. You can add the stroke to the shape by selecting the shape layer then right-click on the shape layer and choosing Blending options, then clicking stroke. You can add a stroke color and size that matches your preference. You can add other enhancements such as a shadow. Note that these will have to be done to the shape layer and not the image layer.
4] Add a shadow
You can enhance the image a bit more by adding a shadow. You can right-click on the shape layer and choose Blending options then click on the word Drop shadow. You can choose the size of the shadow and the size. Make the choices that best fit your design.
5] Change the background
You may want to enhance the overall image to make it more attractive. You can achieve this by changing the background. Click on the background then click the Create new fill or adjustment layer icon that is at the bottom of the layers panel. The menu will pop up, choose Solid color. The color picker will appear, choose the color you want and click OK.
Troubleshooting issues
You created followed the steps and the image is above the shape, the image also has the arrow on its layer but the picture disappears and does not show up in the shape. This happens when the image is far from the shape. The layer mask is created but the image is hidden far from the visible part of the shape. The mask will hide any part of the image that is not within the visible part of the shape. There are a few ways to fix this issue. You can select the shape and move it across the canvas until you see the image start showing through it. Another method is to select the image layer and use the direction keys to move it until it starts showing through the shape. The easiest method however would be to release the chilling mask then rearrange the image and the shape on the canvas then redo the clipping mask. To do this, go into the layers panel then right-click on the image and click release clipping mask. You would then see both the image and the shape on the canvas. You would then place the image over the shape so that only the image is visible. You would then go to the layers panel and right click on the image and choose Create clipping mask. This will fix the issue. The clipping mask is created but the image is not filling the shape. This happens when the image is smaller than the shape. This can be fixed without releasing the clipping mask. You have to simply select the image layer and then press Ctrl + T to bring up the image control box, you can then resize the image by using the mouse to drag the control points until it fills the shape. The problem can also be caused by having the image not fully covering the shape and the image may be big enough but just by a little, you can either adjust the size or click it and drag it until it fills the shape. Read: How to recolor objects in Photoshop
How do I insert a picture into a shape in Photoshop?
You can now use this shape as a clipping mask or write text around it as you would do a shape.
How do I place an image on a specific area in Photoshop?
To place an image on a specific area in Photoshop, you need to follow the aforementioned steps. In other words, you can use the Make work path option. Following that, you can set the tolerance level to 5 and press the OK button. Next, you can modify it as per your requirements.