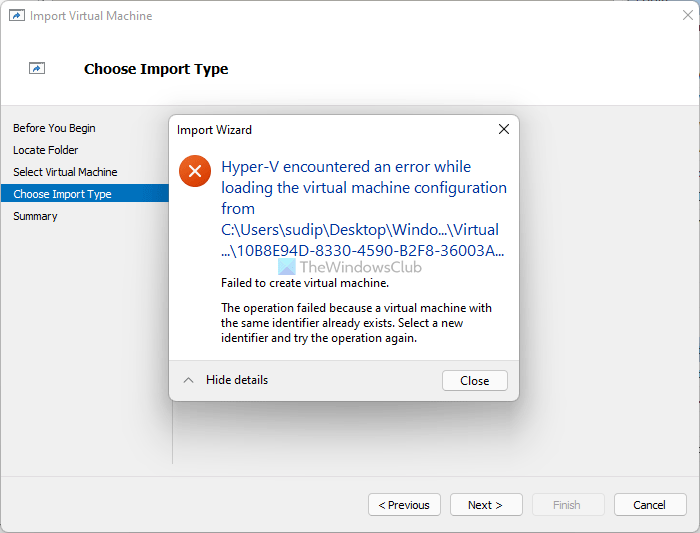
The entire error message says something like this: Hyper-V lets you export and import virtual machines on your computer. It is not that difficult to import a virtual machine on Hyper-V. However, the problem starts when you try to import the same virtual machine on your computer when you already have the original one. In other terms, this error occurs when you select Register the virtual machine in-place or Restore the virtual machine option while importing a virtual machine. Failed to create virtual machine. The operating failed because a virtual machine with the same identifier already exists. Select a new identifier and try the operating again. Whenever you create a virtual machine, Hyper-V generates a unique ID to represent the virtual machine, called an identifier. When you export a virtual machine, it carries that identifier. Similarly, when you import the virtual machine, the identifier also gets installed on your computer. If your computer detects the same identifier while importing, it displays an error message like this.
Hyper-V encountered an error while loading the virtual machine configuration
To fix Hyper-V encountered an error while loading the virtual machine configuration error, follow these steps: To learn more about these steps, continue reading.
1] Delete old virtual machine
If you delete the original virtual machine, the unique identifier will be removed from your computer too. In other words, it will create a space for the old identifier to be installed on your computer. To delete a Hyper-V virtual machine, follow these steps:
Open Hyper-V Manager on your computer.Right-click on the virtual machine.Select the Delete option from the context menu.Click on the Delete button on the confirmation window.
It deleted all the files of your selected virtual machine within moments. Following that, you will be able to import the virtual machine without any error.
2] Create a new unique ID
At times, you might not want to delete a virtual machine to import another one. In such a situation, you can create a new unique ID or identifier. It is possible to do that while importing a virtual machine. To create a new unique ID for the virtual machine, follow these steps:
Open Hyper-V Manager on your computer.Click the Import Virtual Machine option.Choose the virtual machine folder by clicking the Browse button.Choose Copy the virtual machine (create a new unique ID) option in the Choose Import Type tab.Click the Next button and run your virtual machine.
By selecting this option, you are creating a new unique ID for your virtual machine. The imported virtual machine will carry all the old settings except the identifier.
How do I import a virtual machine in Hyper-V?
To import a virtual machine in Hyper-V, you need to use the Import Virtual Machine option. Following that, you can select the exported folder of your virtual machine, select the Copy the virtual machine option, and start the installation. To learn more about importing a virtual machine in Hyper-V, you can read this detailed guide.
Where are Hyper V virtual machines stored?
By default, Windows stores all the Hyper-V files in C:\ProgramData\Microsoft\Windows\Hyper-V folder. However, you can find all the virtual drives in C:\Users\Public\Documents\Hyper-V. Whether you are using Windows 10 or Windows 11, the location is the same. That’s all! Hope this article helped you fix the Hyper-V import issue. Read: How to Install Windows 11 using Hyper-V in Windows 10.

